

Mar
In part 2 of our print/cut tutorial we will be using Flexi to create a cutcontour for our “Don’t Tread On Me,” Snake.
Creating a Perfect Cut Contour With Flexi Sign Using Our Previously Made Print File With Bleed
Preparing a print file with a bleed in Photoshop is the first step towards a flawless cut contour for your design. Flexi Sign, a powerful vector editing program, is ideal for refining and creating precise cut contours. This tutorial will guide you through using the previously made print file with a bleed in Photoshop, generating a rough work path, and refining it in Flexi Sign to create a perfect cut contour.
Step 1: Preparing the Print File in Photoshop
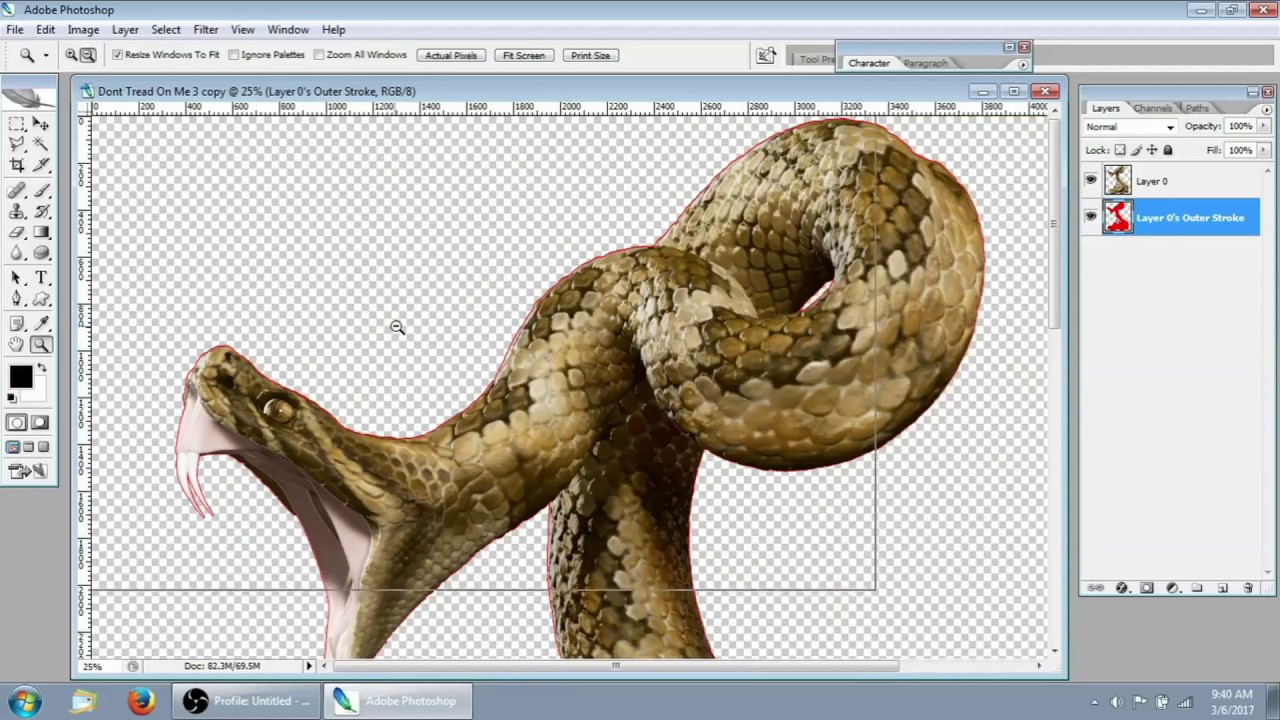
Begin with your print file that includes a bleed.
- Open Your Print File: Open the Photoshop document with your print file that includes the bleed.
- Create a Rough Work Path: Use the Load Selection Tool (P) to create a rough work path around the main elements of your design. This doesn’t have to be perfect, as we will refine it in Flexi Sign.
Step 2: Exporting the Work Path
Export the rough work path from Photoshop for use in Flexi Sign.
- Save the Path: Once your rough work path is created, save it by selecting the path in the Paths panel and choosing “Save Path.”
- Export the Path: Export the path by going to File > Export > Paths to Illustrator. This will save the path as an AI file.
Step 3: Importing into Flexi Sign
Bring the rough work path into Flexi Sign for refinement.
- Open Flexi Sign: Launch Flexi Sign and open a new document.
- Import the Print File: Go to File > Import and select the Print file you saved from Photoshop. This imports your Print File into Flexi Sign.
- Import the AI File: Go to File > Import and select the AI file you exported from Photoshop. This imports your rough work path into Flexi Sign.
- Align The 2 Images: Select both images and align both centers.
Step 4: Refining the Path in Flexi Sign
Use Flexi Sign’s powerful vector editing tools to refine the path.
- Edit Path Nodes: Select the path and use the node editing tools to adjust and refine the path. Ensure the path closely follows the edges of your design elements.
- Smooth Curves: Use the curve smoothing tools to eliminate any rough edges and create a smooth contour that will cut cleanly.
Step 5: Creating the Cut Contour
Finalize the cut contour for your design.
- Define the Cut Contour: Convert your refined path into a cut contour by assigning a specific color or layer that your cutting machine recognizes as a contour cut.
- Add Registration Marks: Add registration marks if necessary to help align the cut contour with the printed design during the cutting process.
Step 6: Saving and Exporting
Save your refined cut contour for the cutting process.
- Save the File: Save your Flexi Sign document with the cut contour defined.
- Export for Cutting: Export the file in the format required by your cutting machine (e.g., EPS, AI).
Conclusion
Using Flexi Sign to refine and create a cut contour for a print file with bleed enhances the precision and quality of your final product. By generating a rough work path in Photoshop and refining it in Flexi Sign, you ensure that your cut lines are accurate and smooth, resulting in a professional finish. Follow these steps to streamline your workflow and produce flawless cut contours for your designs. Dive into Photoshop and Flexi Sign, and elevate your vehicle wraps and other print projects to the next level.
Rattle Snake Image: https://www.auroragraphics.net/?product_cat=&s=Rattle+snake&post_type=product
Youtube: https://www.youtube.com/channel/UCqRsfztWGjUIzM3hIz5ITcg